Crochet Rooster Amigurumi Pattern
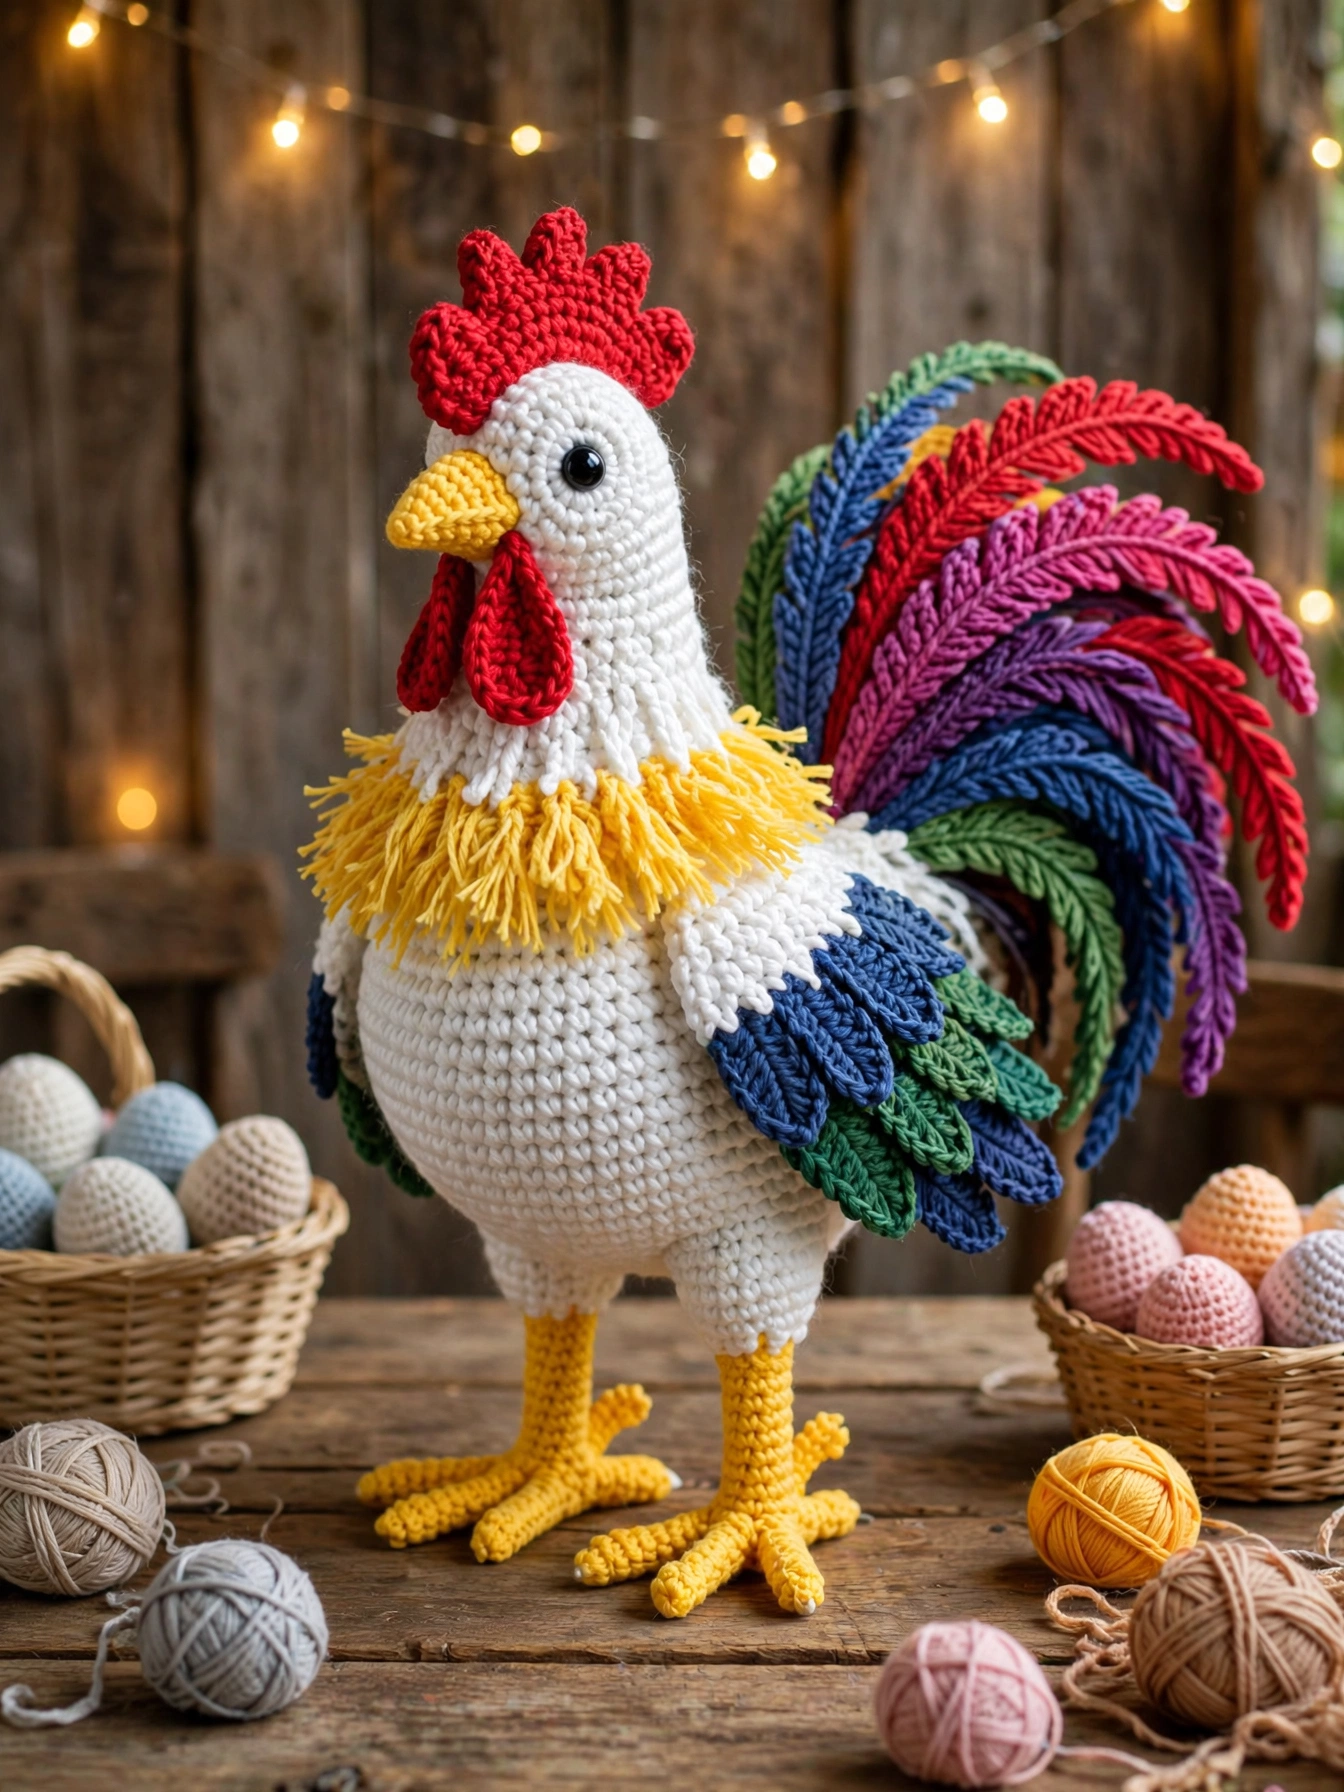
Here is a detailed crochet pattern inspired by the rooster in your photo. It is designed as a freestanding amigurumi rooster, with a white body, red comb and wattles, yellow beak/feet, and colorful layered tail feathers.
Finished Size
Approximately 30–35 cm (12–14 in) tall when made with medium-weight cotton yarn and the recommended hook.
Materials
White cotton yarn — body/head
Red yarn — comb, wattles, tail accents
Yellow/golden yarn — beak, feet and neck fringe
Dark blue yarn
Medium blue yarn
Green yarn
Purple yarn
Pink/magenta yarn
Black yarn or 10–12 mm safety eyes
Crochet hook: 3–3.5 mm
Polyester fiberfill
Tapestry needle
Stitch marker
Pipe cleaner or floral wire for optional tail support
Small amount of felt/cardboard for optional foot stabilization
Abbreviations
MR = magic ring
sc = single crochet
inc = 2 sc in one stitch
dec = invisible decrease
sl st = slip stitch
ch = chain
FO = fasten off
BLO = back loop only
FLO = front loop only
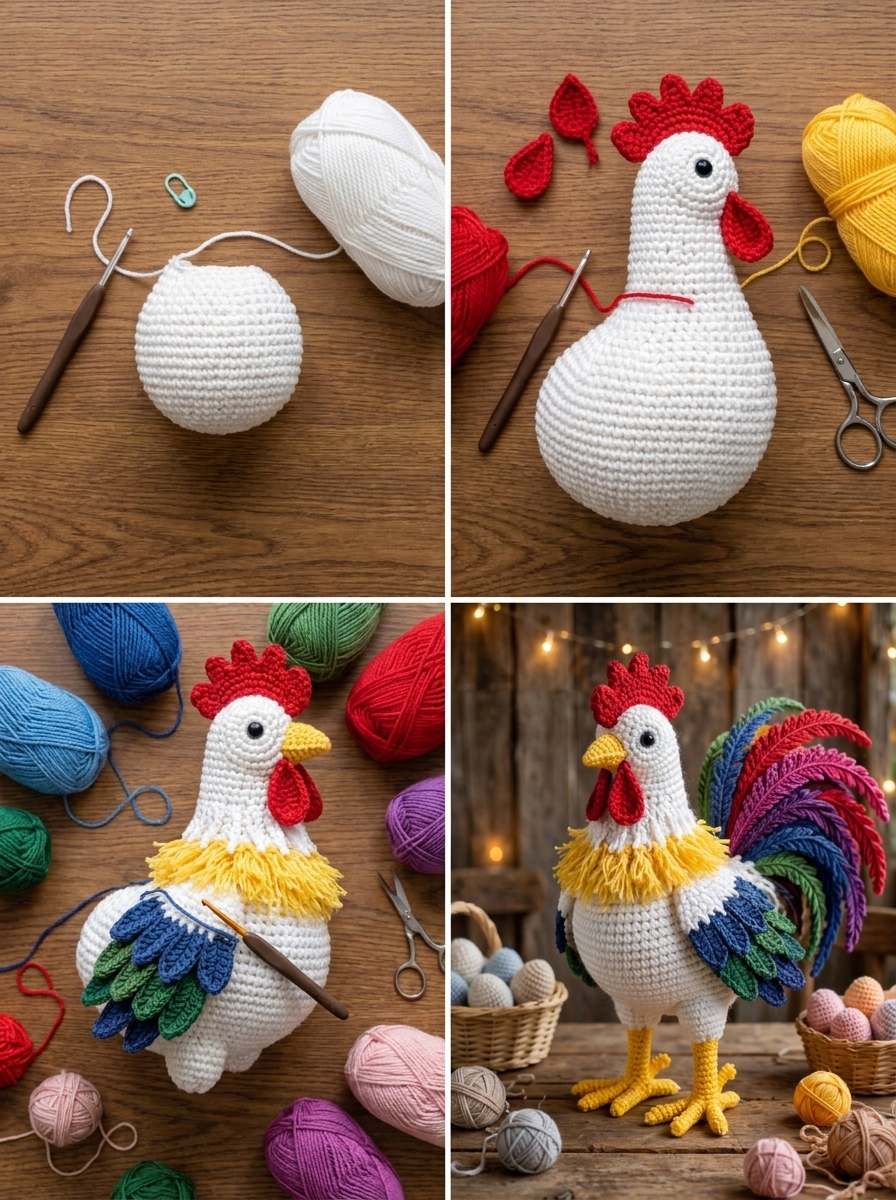
1. HEAD + BODY
Work continuously in rounds.
Head
Round 1: MR, 6 sc — 6
Round 2: inc around — 12
Round 3: (sc, inc) × 6 — 18
Round 4: (2 sc, inc) × 6 — 24
Round 5: (3 sc, inc) × 6 — 30
Round 6–10: sc around — 30
Round 11: (4 sc, inc) × 6 — 36
Round 12–17: sc around — 36
Insert safety eyes between approximately Rounds 11–13, leaving about 8–10 stitches between them.
Begin shaping the lower head/neck:
Round 18: (4 sc, dec) × 6 — 30
Round 19: (3 sc, dec) × 6 — 24
Round 20: sc around — 24
Do not close the piece.
Body
Continue directly from the head.
Round 21: (3 sc, inc) × 6 — 30
Round 22: (4 sc, inc) × 6 — 36
Round 23: (5 sc, inc) × 6 — 42
Round 24–32: sc around — 42
Start making the body more rounded
Round 33: (5 sc, dec) × 6 — 36
Round 34: (4 sc, dec) × 6 — 30
Round 35: (3 sc, dec) × 6 — 24
Stuff firmly.
Round 36: (2 sc, dec) × 6 — 18
Round 37: (sc, dec) × 6 — 12
Round 38: dec × 6 — 6
FO and close the opening.
💡 Tip: Keep the lower body slightly wider than the head. The photograph has a plump, almost egg-shaped body.
2. BEAK 🟡
Use golden-yellow yarn.
Round 1: MR, 6 sc — 6
Round 2: (sc, inc) × 3 — 9
Round 3: sc around — 9
Round 4: (sc, dec) × 3 — 6
Stuff very lightly.
Flatten the opening and sew the beak onto the front of the face.
For the pointed appearance, sew the two sides together toward the tip.
3. RED COMB ❤️
The comb is made from several rounded points.
Use red yarn.
Make 5 small scalloped lobes.
For each lobe:
Row 1: ch 4
Row 2: starting in 2nd ch: sc, hdc, 3 dc in last chain
FO.
Make lobes in different sizes:
1 small
3 medium
1 large
Sew the five pieces together along their bottom edges.
Then attach the completed comb along the top of the head.
For a more 3D look, lightly stuff each lobe before sewing.
4. WATTLES ❤️
Make 2 identical pieces.
Red yarn:
Round 1: MR, 6 sc — 6
Round 2: inc around — 12
Round 3: sc around — 12
Round 4: (sc, dec) × 4 — 8
Round 5: dec × 4 — 4
FO.
Don’t stuff heavily.
Sew the two wattles underneath the beak, hanging vertically.
5. NECK FRINGE / FEATHER COLLAR 🟡
This creates the fluffy golden-yellow collar visible in the photograph.
Use golden-yellow yarn.
Attach yarn around the lower neck.
For each fringe:
ch 8–12, then sl st back into the same attachment point.
Repeat around the entire neck.
Make approximately 30–40 strands.
For a fuller appearance, cut many 8–12 cm pieces of yarn and attach them using a lark’s-head knot.
Trim unevenly to create a shaggy feather collar.
6. WINGS — MAKE 2 🪽
Start with white yarn.
Round 1: MR, 6 sc
Round 2: inc around — 12
Round 3: (sc, inc) × 6 — 18
Round 4: (2 sc, inc) × 6 — 24
Round 5–7: sc around — 24
Round 8: (2 sc, dec) × 6 — 18
Round 9: sc around — 18
Round 10: (sc, dec) × 6 — 12
FO.
Flatten slightly.
Sew the wings onto both sides of the body.
7. BLUE + GREEN WING FEATHERS
This is what gives the rooster its colorful layered appearance.
Make individual feather shapes.
For each feather:
ch 9
Starting in second chain:
sl st, sc, hdc, dc, dc, hdc, sc, sl st
FO.
Make approximately:
6 dark-blue feathers
5 medium-blue feathers
5 green feathers
Layer them over each wing.
Sew only the upper section of each feather so the lower portion remains slightly raised.
Arrange them from small feathers near the top → larger feathers toward the bottom.
8. TAIL FEATHERS 🌈
This is the most important part for matching your picture.
Use:
Red
Pink
Purple
Dark blue
Blue
Green
Make approximately 18–24 long feathers.
Basic feather
ch 25–35
Starting in second chain:
sl st
sc
hdc
dc repeatedly toward the end
3 dc in final chain
Continue down the opposite side of the chain with:
dc
hdc
sc
sl st
FO.
The resulting piece should look like a long curved feather.
Feather sizes
Make:
Small: 20–24 chains
Medium: 26–30 chains
Large: 32–38 chains
Create a mixture of all three sizes.
Tail arrangement
Attach the feathers to the rear of the body in layers:
Bottom layer
Green
Blue
Dark blue
Middle layer
Purple
Pink
Blue
Top layer
Red
Pink
Purple
Curve each feather outward.
For the dramatic rooster-tail shape in your image, position the longest feathers at the outside edges and slightly shorter feathers toward the center.
9. TAIL SUPPORT
For a very large upright tail, insert a piece of pipe cleaner or floral wire inside each long feather before sewing it to the body.
Do not leave sharp wire ends exposed.
Alternatively, sew the feathers onto a small crocheted semicircular base and attach the base firmly to the rooster’s back.
10. LEGS 🟡
Use golden-yellow yarn.
Make 2.
Leg
Round 1: MR, 6 sc
Round 2–12: sc around — 6
FO.
Stuff very lightly.
Sew the legs underneath the body.
